 GraphQL
将 REST API 封装在 GraphQL 中
2016 年 5 月 5 日 由 Steven Luscher
我一次又一次地听到来自前端 Web 和移动开发人员的相同愿望:他们渴望利用 Relay 和 GraphQL 等新技术提供的开发效率提升,但他们现有的 REST API 已经积累了多年的发展势头。如果没有明确证明切换的好处的数据,他们很难为 GraphQL 基础设施的额外投资辩护。
在这篇文章中,我将概述一种快速、低投资的方法,您可以使用它在现有的 REST API 之上建立一个 GraphQL 端点,仅使用 JavaScript。在编写这篇文章的过程中,不会对任何后端开发人员造成伤害。
客户端 REST 包装器#
我们将创建一个 *GraphQL 模式* - 一个描述您的数据宇宙的类型系统 - 它将包装对您现有 REST API 的调用。此模式将在客户端接收和解析 GraphQL 查询。这种架构具有一些固有的性能缺陷,但实施速度快,不需要进行任何服务器更改。
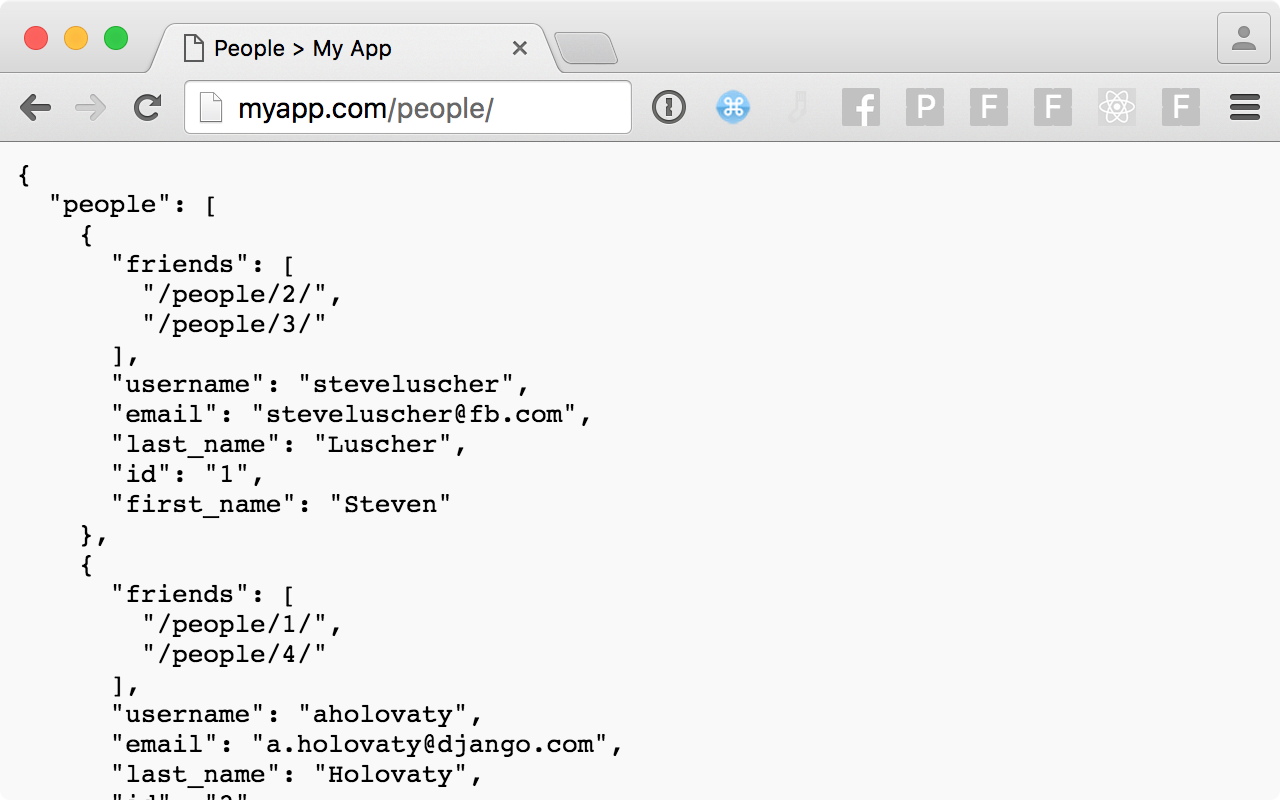
想象一个 REST API,它通过一个 `/people/` 端点公开 `Person` 模型及其关联的朋友。

我们将构建一个 GraphQL 模式,该模式对人和他们的属性(如 `first_name` 和 `email`)以及他们通过友谊与其他人的关联进行建模。
安装#
首先,我们需要一组模式构建工具。
npm install --save graphql
构建 GraphQL 模式#
最终,我们希望导出一个 `GraphQLSchema`,我们可以用它来解析查询。
import { GraphQLSchema } from "graphql"
export default new GraphQLSchema({  query: QueryType,})
在所有 GraphQL 模式的根部是一个名为 `query` 的类型,我们提供其定义,并在此处指定为 `QueryType`。现在让我们构建 `QueryType` - 一个类型,我们将在其上定义人们可能想要获取的所有可能内容。
为了复制我们 REST API 的所有功能,让我们在 `QueryType` 上公开两个字段
- 一个 `allPeople` 字段 - 与 `/people/` 相似
- 一个 `person(id: String)` 字段 - 与 `/people/{ID}/` 相似
每个字段将包含一个返回类型、可选参数定义和一个解析正在查询数据的 JavaScript 方法。
import {  GraphQLList,  GraphQLObjectType,  GraphQLString,} from 'graphql';
const QueryType = new GraphQLObjectType({  name: 'Query',  description: 'The root of all... queries',  fields: () => ({    allPeople: {      type: new GraphQLList(PersonType),      resolve: root => // Fetch the index of people from the REST API,    },    person: {      type: PersonType,      args: {        id: { type: GraphQLString },      },      resolve: (root, args) => // Fetch the person with ID `args.id`,    },  }),});
现在让我们先把解析器留作草稿,然后继续定义 PersonType。
import {  GraphQLList,  GraphQLObjectType,  GraphQLString,} from 'graphql';
const PersonType = new GraphQLObjectType({  name: 'Person',  description: 'Somebody that you used to know',  fields: () => ({    firstName: {      type: GraphQLString,      resolve: person => person.first_name,    },    lastName: {      type: GraphQLString,      resolve: person => person.last_name,    },    email: {type: GraphQLString},    id: {type: GraphQLString},    username: {type: GraphQLString},    friends: {      type: new GraphQLList(PersonType),      resolve: person => // Fetch the friends with the URLs `person.friends`,    },  }),});
关于 PersonType 的定义,请注意两点。首先,我们没有为 email、id 或 username 提供解析器。默认解析器只需访问与字段同名的 person 对象的属性。这在所有情况下都有效,除了属性名称与字段名称不匹配的情况(例如,字段 firstName 与 REST API 响应对象中的 first_name 属性不匹配)或访问属性不会产生我们想要的对象的情况(例如,我们想要 friends 字段的人员对象列表,而不是 URL 列表)。
现在,让我们编写从 REST API 获取人员的解析器。因为我们需要从网络加载,所以我们无法立即返回一个值。幸运的是,resolve() 可以返回一个值或一个值的 Promise。我们将利用这一点来向 REST API 发起一个 HTTP 请求,该请求最终解析为符合 PersonType 的 JavaScript 对象。
这就是它 - 对模式的完整第一遍
import {  GraphQLList,  GraphQLObjectType,  GraphQLSchema,  GraphQLString,} from 'graphql';
const BASE_URL = 'https://myapp.com/';
function fetchResponseByURL(relativeURL) {  return fetch(`${BASE_URL}${relativeURL}`).then(res => res.json());}
function fetchPeople() {  return fetchResponseByURL('/people/').then(json => json.people);}
function fetchPersonByURL(relativeURL) {  return fetchResponseByURL(relativeURL).then(json => json.person);}
const PersonType = new GraphQLObjectType({  /* ... */  fields: () => ({    /* ... */    friends: {      type: new GraphQLList(PersonType),      resolve: person => person.friends.map(fetchPersonByURL),    },  }),});
const QueryType = new GraphQLObjectType({  /* ... */  fields: () => ({    allPeople: {      type: new GraphQLList(PersonType),      resolve: fetchPeople,    },    person: {      type: PersonType,      args: {        id: { type: GraphQLString },      },      resolve: (root, args) => fetchPersonByURL(`/people/${args.id}/`),    },  }),});
export default new GraphQLSchema({  query: QueryType,});
使用 Relay 的客户端模式#
通常,Relay 会通过 HTTP 将其 GraphQL 查询发送到服务器。我们可以注入 @taion 的自定义 relay-local-schema 网络层来使用我们刚刚构建的模式解析查询。将此代码放在任何保证在挂载 Relay 应用程序之前执行的地方。
npm install --save relay-local-schema
import RelayLocalSchema from 'relay-local-schema'; import schema from './schema'; Relay.injectNetworkLayer( new RelayLocalSchema.NetworkLayer({ schema }));
就是这样。Relay 会将所有查询发送到您自定义的客户端驻留模式,该模式反过来会通过调用您现有的 REST API 来解析它们。
服务器端 REST 包装器#
上面演示的客户端 REST API 包装器应该可以帮助您快速入门,以便您可以尝试 Relay 版本的应用程序(或应用程序的一部分)。
但是,正如我们之前提到的,这种架构由于 GraphQL 仍然调用您的底层 REST API,而这可能非常网络密集,因此存在一些固有的性能缺陷。下一步是将模式从客户端移到服务器端,以最大程度地减少网络上的延迟,并为您提供更多缓存响应的能力。
花接下来的 10 分钟时间观看我使用 Node 和 Express 构建上面 GraphQL 包装器的服务器端版本。
奖励回合:真正的 Relay 兼容模式#
我们上面开发的模式将适用于 Relay,直到您要求 Relay 为您已经下载的记录重新获取数据为止。Relay 的重新获取子系统依赖于您的 GraphQL 模式公开一个特殊字段,该字段可以通过 GUID 获取数据宇宙中的任何实体。我们称之为节点接口。
要公开节点接口,您需要执行以下两项操作:在查询的根部提供一个node(id: String!) 字段,并将所有 ID 切换到 GUID(全局唯一 ID)。
graphql-relay 包含一些辅助函数,可以轻松完成此操作。
npm install --save graphql-relay
全局 ID#
首先,让我们将PersonType 的id 字段更改为 GUID。为此,我们将使用graphql-relay 中的globalIdField 辅助函数。
import { globalIdField } from "graphql-relay"
const PersonType = new GraphQLObjectType({  name: "Person",  description: "Somebody that you used to know",  fields: () => ({    id: globalIdField("Person"),    /* ... */  }),})
在幕后,globalIdField 返回一个字段定义,该定义通过将类型名称'Person' 和 REST API 返回的 ID 进行哈希来将id 解析为GraphQLString。稍后,我们可以使用fromGlobalId 将此字段的结果转换回'Person' 和 REST API 的 ID。
节点字段#
graphql-relay 中的另一组辅助函数将帮助我们开发节点字段。您的工作是为辅助函数提供两个函数
- 一个函数可以根据 GUID 解析对象。
- 一个函数可以根据对象解析类型名称。
import { fromGlobalId, nodeDefinitions } from "graphql-relay"
const { nodeInterface, nodeField } = nodeDefinitions(  globalId => {    const { type, id } = fromGlobalId(globalId)    if (type === "Person") {      return fetchPersonByURL(`/people/${id}/`)    }  },  object => {    if (object.hasOwnProperty("username")) {      return "Person"    }  })
上面的对象到类型名称解析器不是工程学上的奇迹,但您明白了。
接下来,我们只需要将nodeInterface 和nodeField 添加到我们的模式中。以下是一个完整的示例
import {  GraphQLList,  GraphQLObjectType,  GraphQLSchema,  GraphQLString,} from 'graphql';import {  fromGlobalId,  globalIdField,  nodeDefinitions,} from 'graphql-relay';
const BASE_URL = 'https://myapp.com/';
function fetchResponseByURL(relativeURL) {  return fetch(`${BASE_URL}${relativeURL}`).then(res => res.json());}
function fetchPeople() {  return fetchResponseByURL('/people/').then(json => json.people);}
function fetchPersonByURL(relativeURL) {  return fetchResponseByURL(relativeURL).then(json => json.person);}
const { nodeInterface, nodeField } = nodeDefinitions(  globalId => {    const { type, id } = fromGlobalId(globalId);    if (type === 'Person') {      return fetchPersonByURL(`/people/${id}/`);    }  },  object => {    if (object.hasOwnProperty('username')) {      return 'Person';    }  },);
const PersonType = new GraphQLObjectType({  name: 'Person',  description: 'Somebody that you used to know',  fields: () => ({    firstName: {      type: GraphQLString,      resolve: person => person.first_name,    },    lastName: {      type: GraphQLString,      resolve: person => person.last_name,    },    email: {type: GraphQLString},    id: globalIdField('Person'),    username: {type: GraphQLString},    friends: {      type: new GraphQLList(PersonType),      resolve: person => person.friends.map(fetchPersonByURL),    },  }),  interfaces: [ nodeInterface ],});
const QueryType = new GraphQLObjectType({  name: 'Query',  description: 'The root of all... queries',  fields: () => ({    allPeople: {      type: new GraphQLList(PersonType),      resolve: fetchPeople,    },    node: nodeField,    person: {      type: PersonType,      args: {        id: { type: GraphQLString },      },      resolve: (root, args) => fetchPersonByURL(`/people/${args.id}/`),    },  }),});
export default new GraphQLSchema({  query: QueryType,});
驯服病态查询#
考虑以下朋友的朋友的朋友查询
query { person(id: "1") { firstName friends { firstName friends { firstName friends { firstName } } } }}
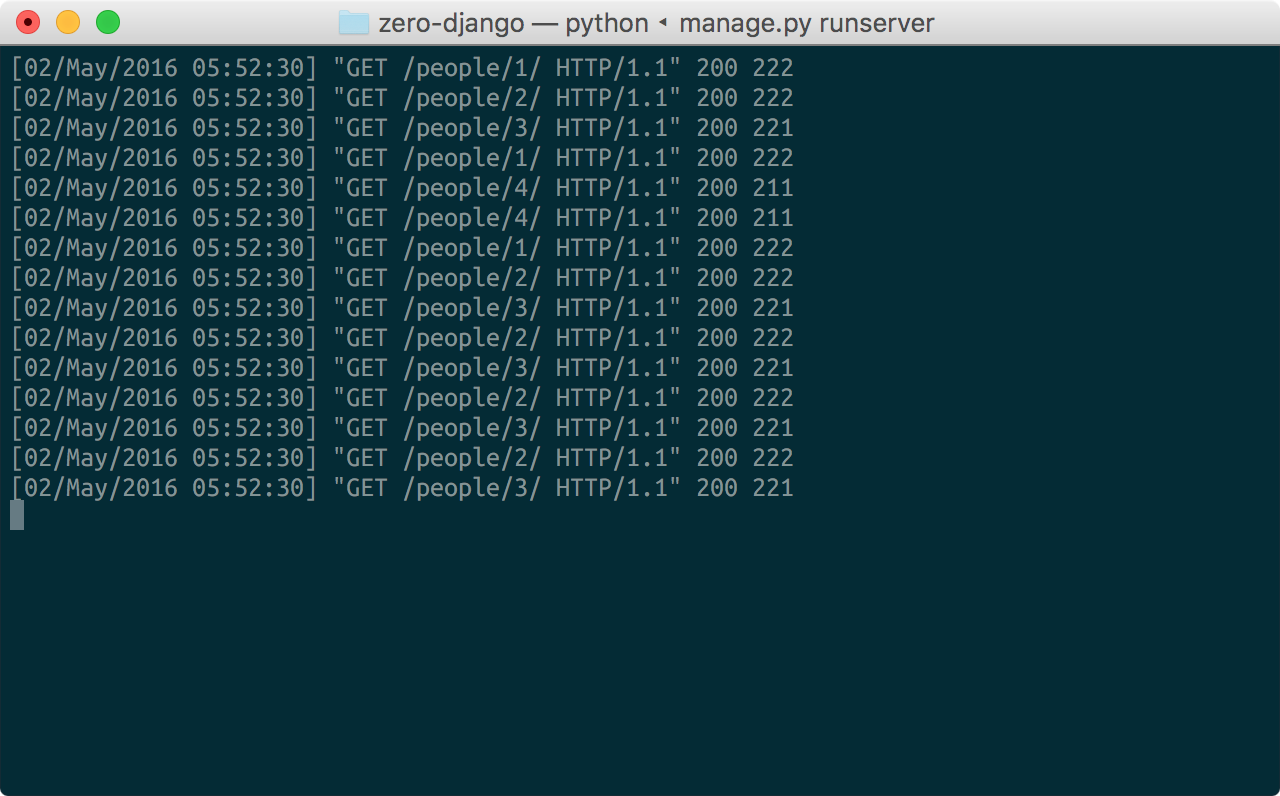
我们上面创建的模式将为相同数据生成多个往返 REST API 的请求。

这显然是我们想要避免的!至少,我们需要一种方法来缓存这些请求的结果。
我们创建了一个名为 DataLoader 的库来帮助驯服这类查询。
npm install --save dataloader
特别注意,确保您的运行时提供 Promise 和 Map 的原生或填充版本。阅读更多 DataLoader 网站。
创建数据加载器#
要创建 DataLoader,您需要提供一个方法,该方法可以根据键列表解析对象列表。在我们的示例中,键是我们访问 REST API 的 URL。
const personLoader = new DataLoader(urls => Promise.all(urls.map(fetchPersonByURL)))
如果此数据加载器在其生命周期中多次看到一个键,它将返回响应的记忆(缓存)版本。
加载数据#
我们可以使用 personLoader 上的 load() 和 loadMany() 方法来加载 URL,而无需担心每次 URL 都会多次访问 REST API。以下是一个完整的示例
import DataLoader from 'dataloader';import {  GraphQLList,  GraphQLObjectType,  GraphQLSchema,  GraphQLString,} from 'graphql';import {  fromGlobalId,  globalIdField,  nodeDefinitions,} from 'graphql-relay';
const BASE_URL = 'https://myapp.com/';
function fetchResponseByURL(relativeURL) {  return fetch(`${BASE_URL}${relativeURL}`).then(res => res.json());}
function fetchPeople() {  return fetchResponseByURL('/people/').then(json => json.people);}
function fetchPersonByURL(relativeURL) {  return fetchResponseByURL(relativeURL).then(json => json.person);}
const personLoader = new DataLoader(  urls => Promise.all(urls.map(fetchPersonByURL)));
const { nodeInterface, nodeField } = nodeDefinitions(  globalId => {    const {type, id} = fromGlobalId(globalId);    if (type === 'Person') {      return personLoader.load(`/people/${id}/`);    }  },  object => {    if (object.hasOwnProperty('username')) {      return 'Person';    }  },);
const PersonType = new GraphQLObjectType({  name: 'Person',  description: 'Somebody that you used to know',  fields: () => ({    firstName: {      type: GraphQLString,      resolve: person => person.first_name,    },    lastName: {      type: GraphQLString,      resolve: person => person.last_name,    },    email: {type: GraphQLString},    id: globalIdField('Person'),    username: {type: GraphQLString},    friends: {      type: new GraphQLList(PersonType),      resolve: person => personLoader.loadMany(person.friends),    },  }),  interfaces: [nodeInterface],});
const QueryType = new GraphQLObjectType({  name: 'Query',  description: 'The root of all... queries',  fields: () => ({    allPeople: {      type: new GraphQLList(PersonType),      resolve: fetchPeople,    },    node: nodeField,    person: {      type: PersonType,      args: {        id: { type: GraphQLString },      },      resolve: (root, args) => personLoader.load(`/people/${args.id}/`),    },  }),});
export default new GraphQLSchema({  query: QueryType,});
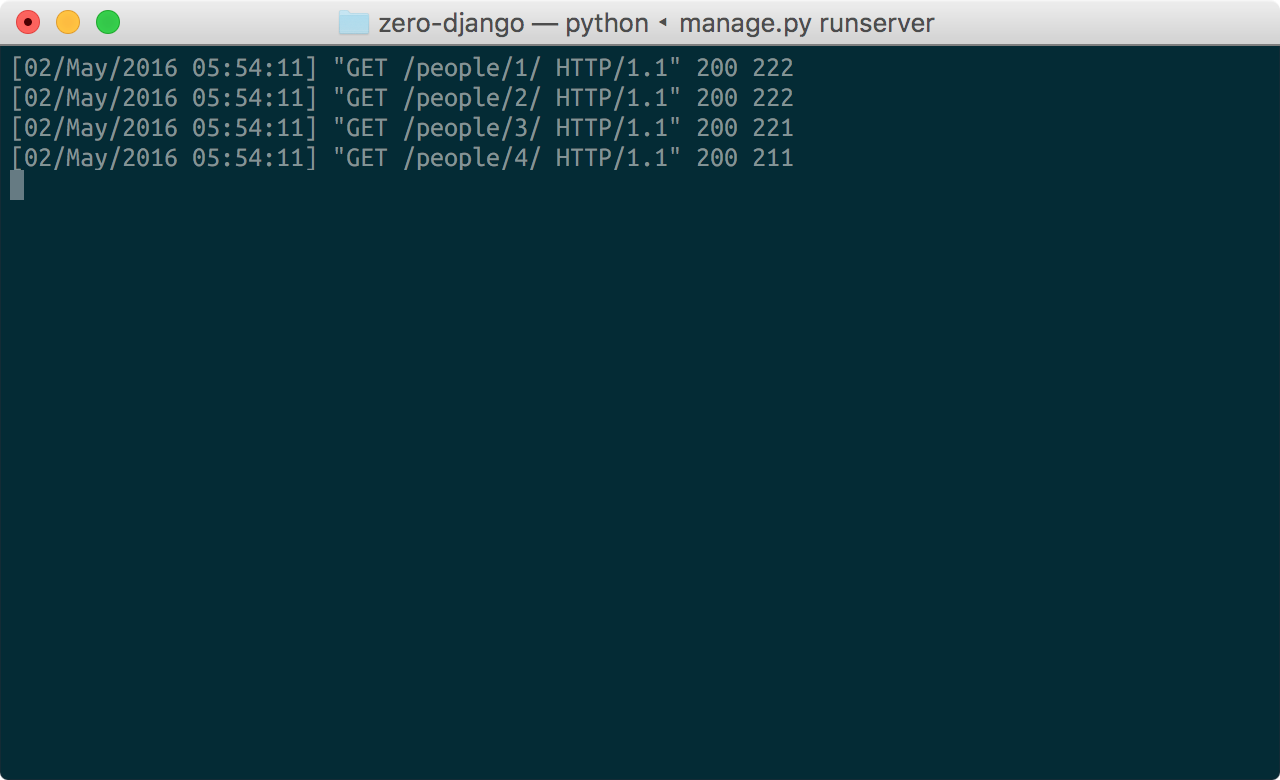
现在,我们的病态查询会生成以下对 REST API 的去重请求集

查询规划及其他#
请注意,您的 REST API 可能已经提供配置选项,让您能够急切地加载关联。也许要加载一个人及其所有直接朋友,您可能需要访问 URL /people/1/?include_friends。为了在您的 GraphQL 模式中利用这一点,您需要能够根据查询本身的结构(例如,friends 字段是否为查询的一部分)来开发一个解析计划。
对于那些对当前关于高级解析策略的思考感兴趣的人,请关注 拉取请求 #304。
感谢阅读#
我希望这个演示能够消除您与功能性 GraphQL 端点之间的某些障碍,并激励您在现有项目中尝试 GraphQL 和 Relay。